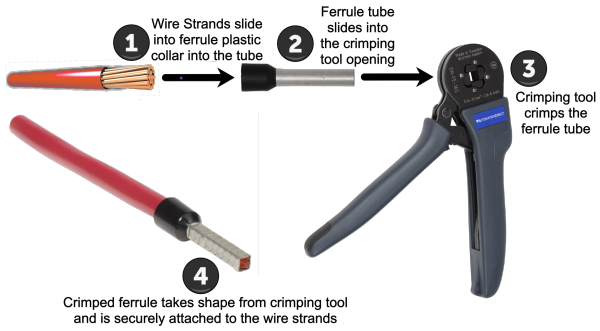
How to crimp a Ferrule Connector
Choose the right ferrule size: Make sure that the size of the ferrule matches the gauge of the wire you are working with. This will ensure a secure and reliable connection.
Strip the wire: Use a wire stripper to remove the insulation from the end of the wire, leaving about 3-4mm of bare wire exposed.
Insert the wire into the ferrule: Insert the stripped end of the wire into the ferrule. Make sure that the wire is fully inserted and that no strands are sticking out of the end of the ferrule.
Position the ferrule: Slide the ferrule over the end of the wire until it is flush with the insulation.
Crimp the ferrule: Use a crimping tool to crimp the ferrule onto the wire. Place the ferrule and wire into the appropriate size slot of the crimping tool, and squeeze the handles of the tool until the ferrule is tightly crimped onto the wire. Make sure that the crimping tool is calibrated to the correct size for the ferrule being used.
Inspect the crimp: After crimping, inspect the connection to ensure that it is secure and that there are no strands of wire protruding from the ferrule.
Repeat: Repeat the process for each wire that needs to be connected using a ferrule connector.
3007
0
754
172

