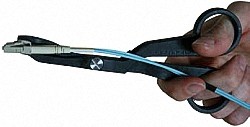
How to remove an LC connector
Step 1: Get Your Tools Ready
Gather the required tools before attempting to remove a fiber optic LC connector. A dust cap, a fiber optic connector cleaner, and a lint-free cloth are required. A magnifying glass or microscope can also be useful for checking the connector after it has been removed.
2. Examine the Connector
You should check the connector to make sure there is no damage or contamination before removing it. Examine the connector with a microscope or magnifying glass to look for chips, cracks, or scratches. Avoid attempting to remove the connector if there is damage because doing so could lead to further harm to the cable or equipment.
3. Clean the Connector
After that, clean the fiber optic connector of any dust or dirt with a fiber optic connector cleaner. As you apply light pressure, place the cleaner onto the connector and gently twist it in a circular motion. Repeat this procedure to make sure the connector is totally clean on both sides.
Remove the connector in Step 4
To unplug the connector, firmly grab the connector's body and pull it away from the socket. The cable or equipment may be harmed if the connector is bent or twisted. Do not force the connector if it is challenging to remove. Instead, take it straight out of the socket while gently wriggling it back and forth.
Step 5: Check the Connector Once More
After removing the connector, give it one more look using a magnifying glass or microscope. Search for any contamination or damage that might have happened during removal. If there are any problems, you should clean the connector once again or, if necessary, replace it.
Cover the Connector in Step 6
After removing the connector, make sure to cover it with a dust cap to keep dust and debris out of the socket. Press the dust cap firmly onto the connector until it clicks into place.
5597
0
754
172

